


Installing the rain chain - Attaching the Chain -
Continuing from the constructing of the base, we will finally attach the rain chain.
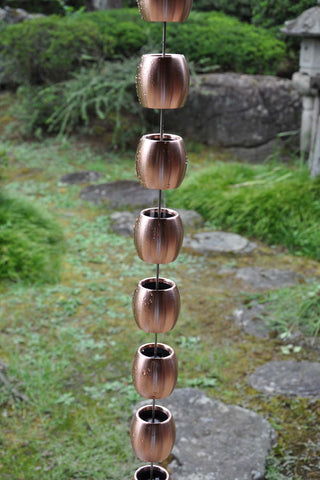
Rain chain / Tama (Copper, φ60mm)
Horizontal gutter shape / square gutter
Standard accessories: Stainless water collector, hanging bracket, wing nut, 2 hexagon nuts
*Optional add-ons: Wire with fastener, circular sleeve, hex socket set screw, hex wrench
Tools / permanent marker, electric drill, pilot hole drill (φ3 mm), hole saw (for φ45 mm), hard wire cutter, caulking agent

First, make a hole in the horizontal gutter where the water collector fits.
Use the hanging string from the previous installation instruction and mark the hole position with a permanent marker.

Make a hole so that the water collector fits in this position, but when using the existing square gutter, please make sure that the water collector can fit. If it gets stuck anywhere, you would need to cut it for use.

Next, make a pilot hole with an electric drill.

Make a φ45 mm hole with a hole saw from above.
If you make a hole from the bottom, the burr will come out to the upper side, and the water collector may not fit neatly to the mounting surface of the horizontal trough, so please try your best to create the hole from the top.


The area around the hole is trimmed with a metal file.


Fix the water collector to the horizontal trough with caulking agent.

The gap is successfully filled.
Now, we will attach the rain chain.
First, lift up from the water collector hole with one hexagon nut attached to the long screw at the upper end of the rain chain.
Pass through the hanging bracket and tighten the hanging bracket with the second hexagon nut, and then perform the final tightening with the wing nut. The double nut prevents the screws from loosening and falling off. Please be careful not to drop the metal fittings since they are small.


Next, we will connect the rain chain to the anchor.
To be sure, the customer ordered the rain chain with sufficient length, so the extra portion will be removed. (one piece in this example). Cut the stainless-steel rod just above the rain chain to be removed.

Remove the packing plastic bag.

Fix the lower end with the optionally included wire.
First, pass the wire with the fastener attached through the bottom chain.

Pass through the circular sleeve.

Then, through the anchor.

Pass it one more time through the circular sleeve.

It will fit tighter if you pull the wire as much as possible.

You can fix it by tightening the set screws (3 places) attached to the circular sleeve with the included hexagon wrench as accessory.

Cut the excess wire to complete.


By attaching the rain chain to the eaves, it allowed the viewer to feel the depth of the eaves.
It began to rain just as the installation was completed.
The flow of rain from the rain chain to the stone is seamless and smooth.

When shifting my eyes to the stone which was placed the last time , I realized that moss was growing on it. By having the rain flow over the stone, the moss will surely grow well.

