


Installing the rain chain -construction of the base-

This house has recently been renovated.
There is a large window glass facing the garden, and I went to interview the owners because I was informed that a rain chain will be newly installed as part of the scenery when looking out at the garden from the inside.
I hope it will serve as a reference for incorporating a rain chain from the perspective of both functionality and design.

Installation of the new rain chain while keeping the original pipe type downspout.
The outline of the construction:
・ Lay the pipe to the existing rainwater catch basin to drain it.
・ Setup the bottom of the rain chain
・ Attach the “Tama” rain chain
This is the installation site. A rain chain will be located in the center of the photo.

First deciding the position where the rain chain will be installed.
Tie a vinyl string to the horizontal gutter and hang it toward the ground. Attaching a weight to the tip of the string will prevent swerving by wind and you can accurately grasp the position.
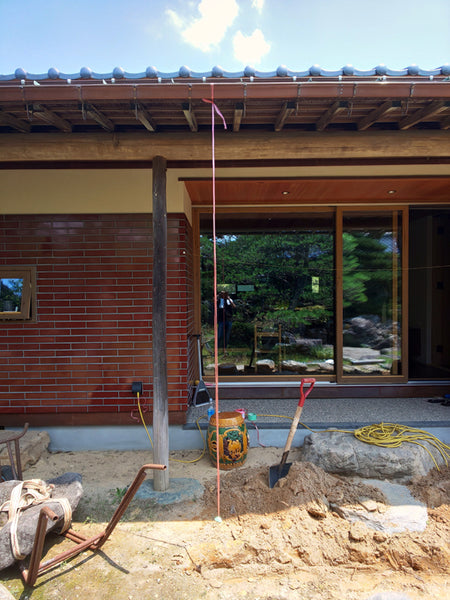
It was decided to attach the rain chain here.
Although there is a distance to the rainwater catch basin, we will carry out construction to lay the pipe to just below the rain chain.

Burry the pipe with a slope so that the rain chain side is slightly higher.
An elbow-shaped joint is used because the pipe bends 90 degrees on its way to the catch basin. A catch basin was placed to the end just below the rain chain. The lid of the catch basin has a grid pattern with a width of 8 mm. Finally, since the top of the box is to be covered with pebbles, stones larger than 8 mm will not fall into this.


As shown in the photo below, the position of the catch basin is slightly off from directly below the rain chain because a stone that guides the rainwater under the rain chain is placed. If you do not incorporate this particular mechanism, install the piping so that the catch basin is directly under the rain chain.

Bury the pipe. Make sure that only the catch basin is out of the soil. Make sure to keep soil out of the basin.


Next, we will install stones to guide rainwater.
In this setup, we have them using a natural stone called “Chokaiseki” that is produced in Tohoku. Rainwater will flow using the natural stone pits.

It was able to be placed it in the right spot while looking at the positional relationship between the rain chain and the catch basin.

Next, mortar the feet of the stone and the area around the pipe near the rainwater basin.
At the same time, the ground around the catch basin is arranged in a pot shape with mortar so that the water flowing down from the stone will flow smoothly into the catch basin.


After drying for a day, adding pebbles and paving are carried out to complete the base portion. In addition, we did not use our company’s weights this time, so we asked them to embed anchor bolts in the stone. When viewed from indoors, the anchor bolts are hidden by stone dents.

Next time, we will explore installation of rain chains.
